Pages

Wednesday, March 16, 2022

WIP Wednesday - Finish Cross Stitch

This project worked up pretty quick - it was easy because it was only one color!  

I used DMC Color # 3845.  I chose this pattern because it matches my Vintage "Butterprint" Pyrex.  I love my Pyrex and I was please to find a pattern to match it.  

I just need to find a 7 1/2 inch wooden hoop to mount it and hang it up in my kitchen.  I am having trouble finding a wooden hoop that size.  I found some on Amazon, but I don't need TEN of them, I just need ONE.  I will keep searching - I would love to find one with the little picture hook at the top, but those are not as easy to find as they used to be years ago (gosh, I miss K-Mart, where I could usually find things like that).  

Anyway...I am happy with it.  Now I need to decide on my next crafty project...what will it be?  Hmm??


Sunday, March 13, 2022

An the COVID-19 Pandemic Continues . . .


On Friday, March 13th, 2020....we were told to work from home the next two weeks because of this COVID-19 virus had hit the USA.  We thought we'd be teleworking for 2 weeks.  Then they told us to work home for 2  more weeks, then through the remainder of April, then through the month of May, then we were told...until further notice.

There were a few attempts to bring people back part time - 2 days a week and we were staggered out - that started but then a few months later, we'd be told again...go back to teleworking 100%

I never thought that 2 years later, we would still be teleworking. While teleworking has its advantages, I miss the routine and I miss my co-workers.  Mostly, I just miss the world being "normal"


Monday, March 7, 2022

Elvis' (& Sheree's) Banana Bread

It is a pretty well known fact that Elvis Presley (the greatest of all time), loved southern food and one of his favorite meals was Peanut Butter and Banana Sandwiches.  Now...don't knock it if you haven't tried it.  If you like peanut butter and you like bananas, you will like it.  Elvis knew what he was talking about.

As for me...not a big fan of bananas...I like the flavor just fine and like dried bananas and like the flavor of bananas in things but it is a texture thing for me.  Peanut Butter on the other hand, well, I probably could live off peanut butter.  

And what is the best thing to pair with peanut butter...chocolate of course. 

My sister loves chocolate chip banana bread and I admit - so do I (as long as the bananas are well mashed).  I also love peanut butter so....what better to make than Peanut Butter Chocolate Chip Banana Bread or "Elvis' Banana Bread"

My former boss, Margaret, made the BEST chocolate chip banana bread...I miss her.  She moved away several years ago and we lost contact.  I wish I had her recipe, but I don't...so I found a banana bread recipe and improvised.  I added some chocolate chips and some peanut butter cups.  I started to add a little bit of peanut butter to the batter, but thought it might be too much and overpower the banana bread so decided to leave it out this time.

I am making this loaf to share with my sister - hope she likes my twist on it.  It may not be the same as Cinnaholic's but hope she likes it just as much, if not more!


Elvis' Banana Bread

  • 3-4 medium, overripe bananas
  • 3/4 cup sugar
  • 1 egg
  • 1 teaspoon vanilla
  • 1/4 c. vegetable oil
  • 1 1/2 cups All Purpose flour
  • 1 1/4 tsp baking powder
  • 1/2 tsp. baking soda
  • dash of ground cinnamon
  • 1/8 tsp salt
  • 1 cup chocolate chips + additional for topping 
  • 4 Reese's Peanut Butter cups (2 finely chopped and 2 coarsely chopped)

Preheat oven to 350ºF.

Spray a 9 x 5 loaf pan with banking spray

Whisk together the bananas, sugar, egg, oil, and vanilla until smooth.

Add the flour, baking powder, baking soda, cinnamon, and salt and mix to combine (may be a little lumpy - that is okay)

Gently fold in the chocolate chips and 2 finely chopped peanut butter cups, careful to not over mix.

Pour the batter into the prepared pan. Sprinkle with some chocolate chips and 2 coarsely chopped peanut butter cups).  

If desired, sprinkle with just a little bit of sugar. 


Bake for 55 minutes (start checking for done-ness at 45 minutes, cover the top with foil if needed to prevent over-browning).

Let cool before slicing.

Friday, March 4, 2022

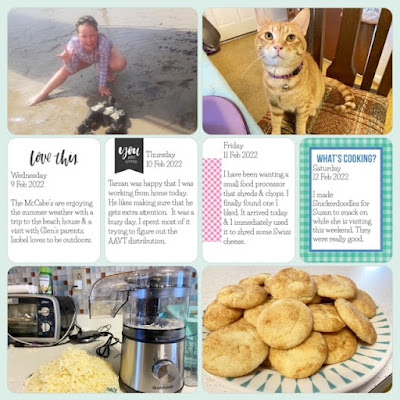
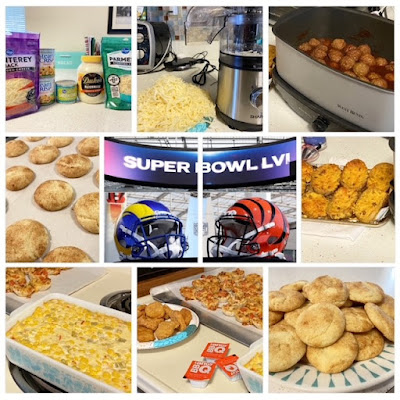
2022 - February Recap

So...how are my goals going this year.  Fairly good on some things...not as good on other things

Seems I have been super busy with work lately and don't have much spare time and I've had some overnight guest a couple of times in the past month, but overall, things are going well.

1) Daily Bible Reading/Prayer - Excellent - I am 100% current with my daily reading.  I started reading about 2 weeks late into the year but I am up to date now.  It feels great to be current and continue to read God's word each day.

2) Weight Loss/Eat Healthier/Exercise - Ok - No weight loss last month, but no gain either.  Just progressing slowly.  I need to start exercising.

3) Watercolor - no painting in January and that is okay.  But I did take a stained glass class and made a wind chime - that was fun!

4) Crochet/Knit - None in February but I have been doing cross-stitch instead.  I do want to start back to crocheting or knitting in March.  We will see.

5)  Personal Journaling - Good - I am still not journaling daily (yet) but I am journaling on a regular basis

6) House Projects - Uhhh - well - needs improvement

7) Scrapbooking/Project Life - Excellent - I am current with my Project Life pages for the year.  I have also been working on completing a book for my cats.  Hope to have that completed and ordered before the end of March.

8) Genealogy - No progress this month - but the 1950s census is coming out next month (April) and that should provide some new insight on things.


Click on Project Life pages below to Enlarge


Thursday, March 3, 2022

Jalapeño Popper Quiche


I recently made a couple of quiches.  I thought I would share this recipe first.  It was very easy to make and was a bit different than your usual quiche.  

Although this has Jalapeño Peppers, it wasn't spicy, because I removed all the seeds.  It just gave it that delicious flavor of a Jalapeño Popper.  YUM!

Jalapeño Popper Quiche
(adapted from Sarah's Kitchen)


1 frozen pie crust
1/2 cup cream cheese, room temperature
1 1/2  jalapeños, diced 
1/2  jalapeño, sliced into 8 rounds
1/2 cup milk
1/2 cup cream
5 large eggs
1/4 teaspoon paprika
1/4 teaspoon nutmeg
1/2 teaspoon salt
1/2 cup cheddar cheese

Preheat oven to 400.

Prick the bottom of the pie crust with a fork and bake for 10 minutes.

While the pie crust is baking, heat the milk and cream in a small saucepan until barely simmering and dice the Jalapeños.  


When the pie crust has baked for 10 minutes, remove from oven and lower the oven to 350.  Spread the softened cream cheese over the bottom of the crust, and top with the diced jalapenos.
 

In a bowl lightly beat the 5 eggs, and slowly add the warm milk and cream.  Stir in the spices.

Pour the mixture into the pie crust and bake for 40 minutes.


Remove from oven and top with grated cheese and 8 jalapeno slices, bake for 5 more minutes.  


I don't know about you, but I really enjoying dicing peppers...peppers of any kind.  I love the smell of peppers and they dice up so nicely...it is just kind of a satisfying and relaxing thing to me.
 
This quiche is good for breakfast but I prefer to eat it for dinner...as I mentioned, if you remove the seeds, it isn't spicy, but just has that tasty pepper flavor.  


Monday, February 28, 2022

World Peace Cookies


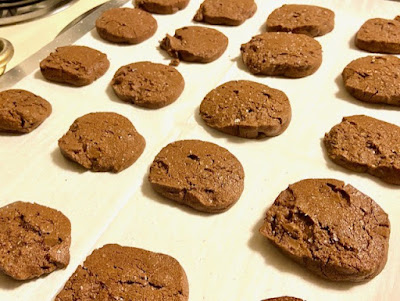
I remember hearing about these "World Peace Cookies" many years ago, but I have never made them.  To be honest, I am not all that crazy about chocolate...yes, I know, I am unusual.  I mean I like a nice Lindt truffle once in a while but I don't usually eat much chocolate, especially in baked good.  But I had a sweet tooth a few nights ago and had all the ingredients on hand and it sounded fairly simple, so I decided...we all need some peace in the World right now so these cookies might be a good thing.

The cookie has a long history, starting sometime before the turn of the millennium, when Chef  Pierre Hermé, created it for a now closed Parisian restaurant called Korova (which was new at the time he created this cookie).

The cookie because well known or shall I say world-wide famous, when culinary guru, Dorie Greenspan renamed them World Peace Cookies and published it in her cookbook.  The story is that her New York neighbor took a taste and said if everyone ate this cookie, it would cause World Peace.  Wouldn't that be wonderful if a cookie had that power?

World Peace Cookies
(from Dorie Greenspan)
Makes about 36 cookies

1 1/4 cups all-purpose flour
1/3 cup unsweetened cocoa powder
1/2 teaspoon baking soda
1 stick plus 3 tablespoons (11 tablespoons) unsalted butter, cut into chunks, at room temperature
2/3 cup packed light brown sugar
1/4 cup sugar
1/2 teaspoon fleur de sel or 1/4 teaspoon fine sea salt
1 teaspoon pure vanilla extract
5 ounces bittersweet chocolate, chopped into irregular sized bits ( I used semi-sweet mini chocolate chips since that is what I had on hand)


In a large bowl, beat the butter and both sugars together until soft, creamy, about 3 minutes. Beat in the salt and vanilla. Add all the dry ingredients and blend. Add the chocolate pieces and mix to incorporate. 


Turn the dough out onto a work surface and gather it together, kneading it if necessary to bring it together. Divide the dough in half. Shape the dough into logs that are 11/2 inches in diameter. Don’t worry about the length — get the diameter right, and the length will follow. Wrap the logs in plastic wrap and refrigerate them for at least 3 hours.

When you’re ready to bake: Center a rack in the oven and preheat it to 325 degrees F. Line baking sheet with parchment paper or silicone baking mats.


Working with one log at a time and using a long, sharp knife, slice the dough into 1/2-inch-thick rounds. (The rounds might crack as you’re cutting them — don’t be concerned, just squeeze the bits back onto each cookie.) Arrange the rounds on the baking sheets, leaving about 2 inches between them. (If you’ve cut both logs, keep one baking sheet in the fridge while you bake the other.)


My note:  I sprinkled half of the cookies with flaky salt and I sprinkled the other half with white sugar before baking - I ended up liking the salted ones the best.

Bake the cookies for 12 minutes — don’t open the oven, just let them bake. When the timer rings, they won’t look done, nor will they be firm, and that’s just the way they should be. Transfer the baking sheet to a cooling rack and let the cookies rest until they are only just warm, at which point you can munch them, or let them reach room temperature.

Bake the remaining dough.

NOTE: The dough can be refrigerated for up to 3 days or frozen for up to 2 months. If you’ve frozen the dough, you needn’t defrost it before baking — just bake the cookies 1 minute long.


Friday, February 18, 2022

Tomato Basil Soup - Instant Pot Recipe

 I love Tomato Basil soup and have been thinking of making it for a while. Since I have vowed to use my Instant Pot at least once a month this year, I decided to see if I could find recipe that I thought I would enjoy...luckily I found one on Recipe Teacher.  This one was a bit different than some others saw.  Most use heavy cream but this one uses Greek yogurt so I decided to give it a try.

Now, I SWORE I took a photo of all the ingredients (as I usually do) but it appears the photo didn't actually take - oh well.

I will just jump right in.

First, this called for 1/2 cup chopped onions.  Now I am not a fan of onions but I do like the flavor it gives so often I substitute onion powder in recipes that call for onions.  However, since I knew this would be blended, I decided to add the onions...so I chopped up 1/2 of an onion

I then put the Instant Pot on "Saute" and melted the butter, added the onions and sauteed for about 5 minutes until the onions seemed done and tender.

My house was starting to smell good at this point.  I then turned off the Instant Pot and added the Fire-Roasted tomatoes, broth, sugar, salt and dried basil.


So far, so good...next, I made sure the pressure valve was sealed, closed the lid (I love that little sound it makes when you open/close the lid) and manually set for 10 minutes on high pressure.


When the timer was up, I opened the vent to release the steam, then used an immersion blender to blend the soup so it would be smooth.


 Finally, I added the Greek yogurt and stirred that in with a spoon.


Results: Tomato-Basil Soup (topped with a little cheese)


Thoughts:  This was pretty good but wasn't life-changing or anything.  I would make it again, but would use fresh instead of dried basil and would try it with cream instead of yogurt.  The yogurt didn't really seem to add much to this recipe and the dried basil took away from the smoothness of the soup.  Plus, I just really like fresh basil.

I may seek out a different Tomato Basil soup to try.  I liked this but didn't love it and for a recipe to become part of my regular rotation, I have to kind of love it.

If you try it, let me know what you think.

Instant Pot Tomato Basil Soup

  • 1/2 medium onion, diced
  • 1 stalk celery
  • 2 28.5oz cans of fire roasted diced tomatoes
  • 2 tablespoons sugar
  • 1 tablespoon dried basil
  • 1/4 teaspoon salt
  • 1 cup low-sodium chicken broth
  • 1 tablespoon butter
  • 1/2 cup Greek yogurt
  • 1/8 teaspoon cayenne pepper (optional)
  1. Set your Instant Pot to saute on high setting and melt the butter. When butter is melted and hot, add onions and celery and saute for about 5 minutes.

  2. Press cancel and add tomatoes, broth, sugar, salt and basil. Not the yogurt yet! With the tomatoes, broth, sugar and basil added to the sauteed onions and celery, secure the lid, close the seal and pressure cook for 10 minutes. When cooking cycle is complete do a quick release of the pressure and remove lid.